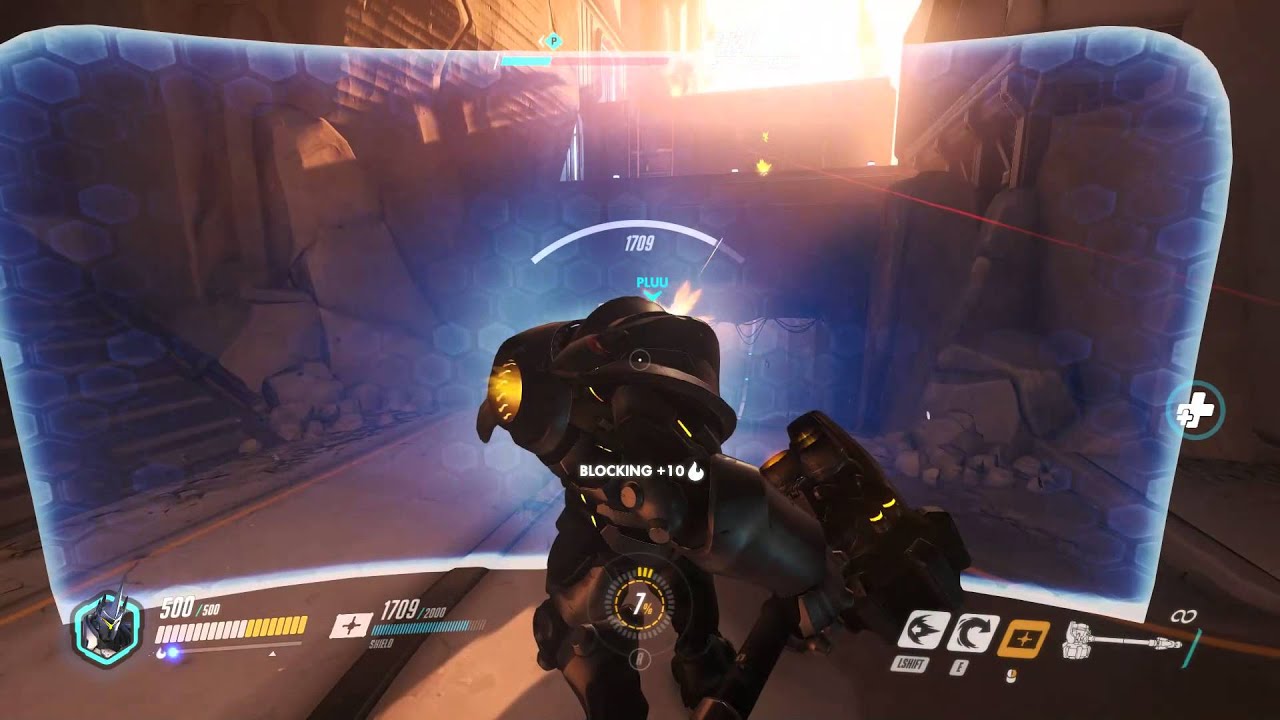
Torbjörn Lindholm is an incredible hero at fortifying a location. Be that on offense for a Pay-load, or defense for a Control-point - Everyone will experience a Torbjörn completely shutting down their teams efforts. Not only will Torbjörn's turret get in the way of every effort you make, his gun and armor packs are also a major threat that usually go unnoticed. Dealing with Torbjörn takes time; much like when dealing with Bastion, Torbjörn naturally punishes careless aggression. To defeat him, and his team, you will need to coordinate your advances when his turret is down or after molten core. Pushing at any other time will be significantly harder to execute.
 |
| https://gfycat.com/ShortAnyLarva |
 |
| https://gfycat.com/ImpureMediocreHen |
Torbjörn's turret is a nightmare for newer players, and in the right hands, still terrifying for skilled and experienced players. Having 3 separate levels, this turret comes equipped with Auto-aim, and a dwarf to protect it. At level 1 the turret only as 150 hp and does 17 damage with 2 Rounds per second; this is the ideal time to hammer a Torbjörn. Once Torbjörn is able to get it to level 2 the turret has 300 HP, fires 4 rounds per second, and still does 17 damage per shot. Finally when Molten core is activated Torbjörn's turret becomes level 3, has 800 HP, fires 5 Rounds per second, and now fires 4 rockets per second for 17 damage per rocket. This is explicitly why spamming Torbjörn's turret down from a distance is key, and timing our efforts for when Molten Core is down.
 |
| https://gfycat.com/WaryWelllitBlackrussianterrier |
Torbjörn's true weakness is the "down-time" of his defensive play. If we consistently harass him and his team, timing our plays when the turret is down as well as molten core, Torbjörn is just a dwarf with a gun. Synchronize your efforts during these times and it will be significantly easier to gain ground and win the match.
Remember no matter what hero we play to counter Torbjörn he naturally punishes thoughtless aggression. Plan your moves, use precision, and strike when he is weak; Torbjörn cannot recover his setup mid fight even with Molten Core.
Hard Counters to Torbjörn
Pharah (Low-Medium Difficulty)
This will be the most natural counter to Torbjörn you can play. Her Rockets have no distance or damage drop make long harassment an easy feat. Concussive Rocket also gives her the ability to manipulate Torbjörn's position, to either put him in harms way or to get him away from the turret. Not only can Pharah freely shoot rockets from any distance at the turret, but she is also one of the best heroes to exploit vertical elements of the map.
Pharah's rockets are simply amazing in these situations. Each rocket does 120 damage per direct hit, has a 3 meter explosion radius, and she can fire almost 2 rockets per second. This makes Pharah's Rocket Launcher ideal for spamming down Torbjörn. Because Pharah is also one of the highest damage out-put heroes in the game she is perfect for helping soften up all the armor packs and negate their impact. This is critical, like mentioned above, pushing into a full health and properly setup team is near impossible. Pharah will uniquely give you angles and opportunities to work with when looking for picks. Combo her rocket spam with any hero that is strong at picking, and you can destroy Torbjörn's turret while taking his life. Keep in mind because Torbjörn's natural inclination towards static positions farming your ultimate charge is easier than most other heroes!
With Jump and Hover Jets Pharah is built to move around the map freely. Jump jets will propel you vertically ~25 meters. Combo'd with fluttering Hover Jets, Pharah can maneuver freely through the vertical parts of the map unlike any other hero. This video (featured to the right) will assist you if you are not aware of some of the alternative paths heroes can take in Overwatch. Exploit Pharah's mobility and there will be many windows to take care of Torbjörn's turret.
 |
| https://www.youtube.com/watch?v=iRYyq1Fw9e0 |
Pharah will always be the all purpose counter to static defensive strategies. She naturally exploits the vertical aspects of each map, and dishes out ridiculous single and multi target damage. Use Pharah to harass and spam down the defense, softening them up. Effect use of Pharah will quickly charge your Ultimate and allow you to dispense justice upon Torbjörn and his gang of friends.
Widowmaker (Low Difficulty)
Widowmakeris terrifying to play against, let alone when your strategy relies on static defensive structures. Snipers naturally counter this kind of play, but Widowmaker is an exceptional sniper with vertical mobility and has information gathering abilities.
 |
| https://www.artstation.com/artwork/A9ANz |
If you fail to kill Torbjörn in one head-shot, it is probably because of Armor Pack. Remember this; and be ready to follow up a half charge shot into his body. Alternatively, if you begin to take down his turret he will be forced to repair. This is a great way to force him out of cover, or in the reverse force him back to cover to finish off the turret. A good Torbjörn player will account for your angles and consistently alter his setup; this makes it imperative for you to do the same.

Widowmaker is a reliable long range option to harass and pick Torbjörn. Use your grapple to exploit better angles and peaks, consistently reconsider how Torbjörn would want to setup, and move accordingly. Never forget that if you get a large tempo advantage from picks, you can zip in and use your Widow's Kiss and an assault rifle to hold/capture the point.
Hanzo (Low Difficulty)
Very similar to Widowmaker, Hanzo is an excellent long range harassment option against Torbjörn.
Although Hanzo's arrows only do 125 damage at max charge, they can be arc'd over cover to hit targets that would otherwise be safe. This is especially useful when he equips his Scatter or Sonic arrow. This property makes Hanzo the go to choice when Widowmaker would be under too much duress. His ability to move quickly, fire and move, and lob arrows will make high risk situations easier to manage and break.
Although Hanzo's arrows only do 125 damage at max charge, they can be arc'd over cover to hit targets that would otherwise be safe. This is especially useful when he equips his Scatter or Sonic arrow. This property makes Hanzo the go to choice when Widowmaker would be under too much duress. His ability to move quickly, fire and move, and lob arrows will make high risk situations easier to manage and break.
Again similar to Widow, Hanzo has no damage drop to his arrows and can effectively harass at any range, and when considering the nature of arrows he can predicatively harass by already having arrows where people will be. This allows Hanzo to shine in situations where Widowmaker is shut out, or lacks utility.
Sonic arrow is useful against Torbjörns'; with a 20 second cooldown sonic arrow is very handy to help against Torbjörn's team; Torbjörn himself is static and more often than not is out in the open. Use Sonic arrow to gain information on the rest of Torbjörn's team while you pick away at him. This will help you avoid the awkward situations where you almost kill the turret but die to another hero flanking or sniping you. Remember that whatever the Sonic Arrow sticks to, in this case barriers or heroes, will stay on and follow, revealing more than just the impact point.
 Scatter arrow is essential when dealing with Torbjörn, or any static hero for that matter. In the right image, the split pattern of the arrow is static and can be used to our advantage. Every scattered arrow will deal 75 damage, and can deal damage to the same target after every bounce. If Hanzo properly lands this arrow the 3 center splits will deal 225 damage, instantly killing Torbjörn. If Torbjörn sets up his turret in a enclosed area, one well placed Scatter arrow will kill the turret and possibly him if he is near by. Remember against targets like Torbjörn that have structures, tagging him or the turret with Scatter arrow will deal the damage of the arrow normally; and then add the splitting arrows which could potentially clean up both targets.
Scatter arrow is essential when dealing with Torbjörn, or any static hero for that matter. In the right image, the split pattern of the arrow is static and can be used to our advantage. Every scattered arrow will deal 75 damage, and can deal damage to the same target after every bounce. If Hanzo properly lands this arrow the 3 center splits will deal 225 damage, instantly killing Torbjörn. If Torbjörn sets up his turret in a enclosed area, one well placed Scatter arrow will kill the turret and possibly him if he is near by. Remember against targets like Torbjörn that have structures, tagging him or the turret with Scatter arrow will deal the damage of the arrow normally; and then add the splitting arrows which could potentially clean up both targets.Although Hanzo has no grapple, he has fast hands and feet and quickly climb up walls to achieve similar effects like Pharah or Widowmaker. Using the vertical aspects of the map is critical to being a good Hanzo. Much like Widow, being able to use these portions of the map opens up a whole new world of angles. Learn where you can go and what angles/peaks it offers - in time Hanzo will become the nightmare of Torbjörn and Bastion alike.
 Ultimates will normally be ignored in counter guides, however because Torbjörn and his turret are inherently static, Dragonstrike can be devastating to synchronize with your push. Using Hanzo's ultimate at the right time opens up large areas of space for your team to push. Not only does the enemy team have to avoid the dragon, but Torbjörn can't move his turret without having to upgrade it again. Running inside a Dragonstrike that is aimed towards the focus of the enemies setup, creates a moment of tempo where your team can strike and dispense of the defense. Again the key here is that Torbjörn will naturally fall pray to your Dragonstrike, this is a guaranteed window of opportunity when pushing and why it gets mentioned here.
Hanzo and Widowmaker will always operate very similar when countering static defenses. However, Hanzo offers more utility, where as Widow offers more damage. Use Hanzo to pick more safely, and use Dragonstrike to great windows for your team to push and seize victory. Remember, arrows being "lob-able" allows Hanzo to reach Torbjörn in covered corners - Scatter arrow and Dragonstrike make it that much easier.
Junkrat (Medium Difficulty)
Junkrat's Grenades are ideal for reaching Torbjörn no matter where he is setup. Concussive mine allows skilled Junkrats to exploit the vertical aspects of the map and rain hell down onto their prey. Junkrat, like Pharah, is a more natural and easier counter to static defenses. Because you can lob your grenades from behind cover, the enemies will be hard pressed to respond; unless they have a Junkrat as well.
 Frag Launcher deals 120 damage per grenade around a 2meter radius of the explosion. Additionally it will bounce 3 times, then shortly explode; if it makes contact with a hero or barrier it will just explode. Knowing this will allow you sneak grenades behind enemies, or right into their faces. Being able to shoot 1.6 grenades per second allows Junkrat to rain volley after volley of explosive death. Torbjörn's have to respect what a Junkrat can do, and how much area they can deny. Using your Grenades well is critical to playing Junkrat against static defenses, so learn the angles and where to spam.
Small things to keep in mind when spamming: 1. Pros and top Junkrats only use 4 of the 5 grenades to ensure they have 1 left to answer incoming threats. 2. Vary angle and distance to vary the ending location, this allows you to catch heroes as they run like crazy from the grenades that are incoming; it also make it hard to predict what is actually a safe area to stand.
 Junkrat is among the top heroes at using the vertical avenues of each map; learn to master this aspect of Junkrat. It will open entirely new angles to spam and reduce the amount of safe area from your grenades. Especially when playing against static defenses, they naturally lack mechanisms to deal with vertical threats. Get above the Torbjörn and his turret and you can shoot the walls behind him without having to risk getting shot by his turret. On a map like Kings Row; if Junkrat is standing in the red rectangle to the left of the image, the black arrows represent potential paths to bounce Grenades. This doesn't cover all the paths, and some are accessible without being there. However, positioning up there makes the angles easier to hit, does grant access to all 3 paths to the final section of the map, and offers a retreating path. If the enemy team uses a turret on the pay-load, this kind of Junkrat play will help negate it quickly.
Ultimates should not be looked at when countering heroes, usually because having them only once or twice a minute is far less reliable of way to counter a hero, than an ability with 5 to 10 seconds cooldown. However like Dragonstrike, Rip Tire is uniquely powerful against static setups. Because Rip Tire does 600 damage in a 10 meter explosion radius and it can climb walls, Junkrat can use this ultimate to create a window of opportunity for his time to push while there is no longer a turret up. Any hero that dies to this, in addition to Torbjörn and his turret, makes the following push that much easier.
Junkrat is an all purpose counter to Torbjörn. Using effective grenade spam destroys Torbjörn's gameplan, and creates large windows for your team to sieze tempo and capture the point or win the match. Because Junkrat can propel himself vertically using concussive mine, he is uniquely suited to dealing with this style of strategy.
Soldier: 76 (Medium Difficulty)
The modern war hero, or all purpose infantry, Soldier: 76 is a strong asset to deal with Torbjörn and his cohorts. Because Soldiers rifle is incredibly accurate and has a rocket launcher, he is suited for picking away at Torbjörn and his turret. Couple that with his self healing, and he can even temporarily tank the turret to ensure its destruction. Soldier in almost all counter situations is a supplemental counter, and will naturally work better when coupled with another counter.
Heavy Pulse Rifle and Helix Rockets are 100% accurate with no distance drop. the Pulse Rifle does 17 damage in close proximity, dropping down to 5 damage at max distance. Helix Rockets will do 120 damage at any distance and have a 8 second cooldown. This inherently gives Soldiers a leg up in any medium, or even long range, aim battle. Against Torbjörn, he can poke at the turret from 41 meters without worrying about accuracy. If Torbjörn decides to defend the turret, Soldier is already well equipped to fight back with self-healing and the better damage.
 Positioning is a critical aspect of every competitive game. It decides who fires first, who knows what first, and where the fights take place. Soldier is the only hero in the game with a no downtime mobility ability. Sprint can be used for any time, and cancelled at any time. Giving Soldier a unique role to consistently manipulate where the enemy meets resistance, or is being suppressed from. Against Torbjörn we can use this in two manners. Consistently changing our angle from where we harass and kill Torbjörn forces him to consider switching, especially if he can never find a safe location to setup. Sprint also gives us the option of flanking, although less reliable than blink, Soldier can use Sprint and Helix Rockets to clear additional air and reach otherwise unreachable locations. Soldier is meant to be mobile; use him this way and static defenses will feel very uncomfortable.
Positioning is a critical aspect of every competitive game. It decides who fires first, who knows what first, and where the fights take place. Soldier is the only hero in the game with a no downtime mobility ability. Sprint can be used for any time, and cancelled at any time. Giving Soldier a unique role to consistently manipulate where the enemy meets resistance, or is being suppressed from. Against Torbjörn we can use this in two manners. Consistently changing our angle from where we harass and kill Torbjörn forces him to consider switching, especially if he can never find a safe location to setup. Sprint also gives us the option of flanking, although less reliable than blink, Soldier can use Sprint and Helix Rockets to clear additional air and reach otherwise unreachable locations. Soldier is meant to be mobile; use him this way and static defenses will feel very uncomfortable. |
| https://gfycat.com/EverlastingBareDevilfish |
Soldier: 76 is an all-purpose response to static defenses. His mobility, self-healing, and accuracy make him well equipped to suppress the defenses, while having the potential to pick them off. He can stand in teamfights, and assist the entire team with Biotic field. Overall Soldier is a solid response to most situations, but especially solid against Torbjörn.
Soft Counters to Torbjörn
Reinhardt (Medium Difficulty)
Reinhardt does not counter much, but he does greatly enhance pushing into static defenses. He also is very well suited for helping a defensive position from any threats (especially payloads with Bastion or a Torbjörn turret on them). Because his barrier can block up to 2000 damage, Reinhardts team has plenty of time to dispense of the static defenses, and then enemy heroes.
Charge is an amazing ability when you want to press the advantage and get into the fight. It has a 3 second duration, with a 10 second cooldown. The cooldown will only begin after the charge is completed so the down time is the same as the cooldown. Charge is especially useful when your team is heavily pressuring the turret and Torbjörn is moving in to heal it, because you can charge him off of it. Be wary that this kind of play is only attempted when your team can back you up. The folly of Reinhardt players is aggressive charging without follow up. Communicate and coordinate with your team to get maximum usage out of Charge.
Charge is an amazing ability when you want to press the advantage and get into the fight. It has a 3 second duration, with a 10 second cooldown. The cooldown will only begin after the charge is completed so the down time is the same as the cooldown. Charge is especially useful when your team is heavily pressuring the turret and Torbjörn is moving in to heal it, because you can charge him off of it. Be wary that this kind of play is only attempted when your team can back you up. The folly of Reinhardt players is aggressive charging without follow up. Communicate and coordinate with your team to get maximum usage out of Charge.
 |
| https://gfycat.com/ImperfectForthrightBittern |
Barrier field is the only ability of its nature, and it is the only Barrier that will absorb 2000 damage. The wide area Barrier Field covers makes capitalizing on picks, or destroyed turrets that much easier.
 The key to good Reinhardt play is noticing these opportunities and pushing forward with your team behind your Barrier. Be aware that it takes a full second for the Barrier to begin healing when sheathed, and it has a 4 second cooldown when destroyed. When you use your Barrier to create room for harassment, be sure to give it ample time to heal before you push in aggressively!
Reinhardt is inherently a supplemental counter to static defenses. He gives you the presense to push when you have seized tempo, and the protection needed to find picks on the defenders. Because his Fire Strike is so effective at harassing, Reinhardt himself can be a threat if the defense doesn't respect his potential. When the moment arises, Reinhardt can charge in and start the point winning or match winning fight.
Zarya (Low-Medium Difficulty)
Zarya is another example of a supplemental counter to static defenses, but on her own Zarya can be a devastating force moving around the map. With her ability to simotaneously block and gain damage, Zarya is a tank that puts out damage numbers second to non. The key to effective Zarya play, especially against Torbjörn and static defenses is aggressive use of Barriers to gain charge and calculated Particle Cannon spam.
 Zarya's primary fire on her Particle Cannon may not be too useful against Torbjörn specifically, but its good to know it does 80 DPS at 0 energy charge. Her alternate fire, which is extremely useful against Torbjörn, does 46 damage with 0 energy charge. Zarya gets 3 charge for every 5 damage the barrier absorbs, allowing her to charge up to 100 energy. She recieves 1% damage for each point of charge, at max giving her double damage. This will cause Zarya's alternate fire to deal 92 damage and because it is lobbed Zarya can effectively harass and kill Torbjörn from pretty great distances. One of the main reasons Zarya is not a hard counter is because these energy grenades are very hard to aim, they fall quickly and do not bounce. Precision aiming with Zarya will take time and feeling out the trajectory, but when mastered can effectively destroy a Turret and Torbjörn in 1 clip.
Remember, like Junkrat we want to reload at 25/100 ammo to avoid being empty if pressured, and to vary our angles to vary the ending location. There is always chance when we vary our shots, more than one connect as the enemy flees.
Zarya's primary fire on her Particle Cannon may not be too useful against Torbjörn specifically, but its good to know it does 80 DPS at 0 energy charge. Her alternate fire, which is extremely useful against Torbjörn, does 46 damage with 0 energy charge. Zarya gets 3 charge for every 5 damage the barrier absorbs, allowing her to charge up to 100 energy. She recieves 1% damage for each point of charge, at max giving her double damage. This will cause Zarya's alternate fire to deal 92 damage and because it is lobbed Zarya can effectively harass and kill Torbjörn from pretty great distances. One of the main reasons Zarya is not a hard counter is because these energy grenades are very hard to aim, they fall quickly and do not bounce. Precision aiming with Zarya will take time and feeling out the trajectory, but when mastered can effectively destroy a Turret and Torbjörn in 1 clip.Remember, like Junkrat we want to reload at 25/100 ammo to avoid being empty if pressured, and to vary our angles to vary the ending location. There is always chance when we vary our shots, more than one connect as the enemy flees.
 Zarya's Barrier Projector is unique in a few ways. They block up to 200 damage over 2 seconds, and will also block more damage than that if it occurs in one instance; i.e. Pulse Bomb, Rip Tire, etc. These Barriers also block all crowd-control effects during their duration, and will remove some status effects (Mei's building freeze/slow [before the actual stun]). Zarya can also simotaneously project a barrier on herself and a teammate to protect 2 of the 6 heroes during a push.
 D.Va (Low-Medium Difficulty)
D.Va is the most unique tank in the game, having a health pool in her mech of almost all Armor, D.Va is hard hero to kill. When in her mech she has 400 Armor and 100 HP. Add that she is as mobile as most offensive heroes, has an ability that blocks all projectiles including ultimates, and comes equipped with AoE damage to crack the defense.
 D.Va with boosters becomes a flying mass of metal that is consistently in your face and around your soft spots. With a 2 second duration and 6 second cooldown, D.Va can consistently reposition. Even more, she can easily aggressively push in fight for 4 seconds, and then quickly boost back out. D.Va is only matched in mobility by Winston, and exploiting mobility versus static targets is key. Remember that your boosters also do a small 25 damage upon impacting an enemy, and will slightly knock them back. On maps with cliffs near control points, you can knock off enemies doing this! Again remember, learn the map and the potential paths. D.Va is an exceptional hero at exploiting the veritcality of the map, and when done properly will make her a menace!
 Defense Matrix is a game winning ability when used properly because it will block every projectile in the game. This includes ultimate's like Barrage, Whole Hog, Blizzard, Etc. Mastering use of this part of D.Va will never be easy, but when D.Va has a very high level of game sense she can negate every hero in the game. Specifically when dealing with Torbjörn she can use Defense matrix to stop a level 3 turrent from barraging her team while they retreat. D.Va can use it when pushing in, to negate all damage coming from Torbjörn and his turret for the 3 second duration. Be aware that the cooldown on this ability is 10 seconds and does not start cooling down until after it expires. Wasting this ability can cost D.Va her mech, so be aware of the heroes around Torbjörn and which abilities you should be prioritizing to block.
Mech: Self-Destruct deserves a mention for similar logic to Rip Tire and Dragonstrike; while ultimates are not reliable counters to strategies or heroes, static defenses suffer from high damage AoE abilities. Because D.Va's mech does 1000 damage in a 20 meter explosion radius, Torbjörn and his team will be hard pressed to escape this ultimate when thrown at their setup. Remember D.Va can use her boosters to lob the mech in, boost in straight in, or even boost it straight up and have it fall back where started. Being able to aim your ultimate is key on D.Va, so take some time to practice it. Once mastered, you can shoot your mech into a door from across the map and surprise your opponents.
D.Va is an all purpose harassment tank, that will help you both create and capitalized on tempo. Know your cooldowns, play aggressively, but use fore-thought. D.Va excels when you can capitalize on the mayhem, so think out your moves and always be ready to escape using boosters!
Comments
Post a Comment