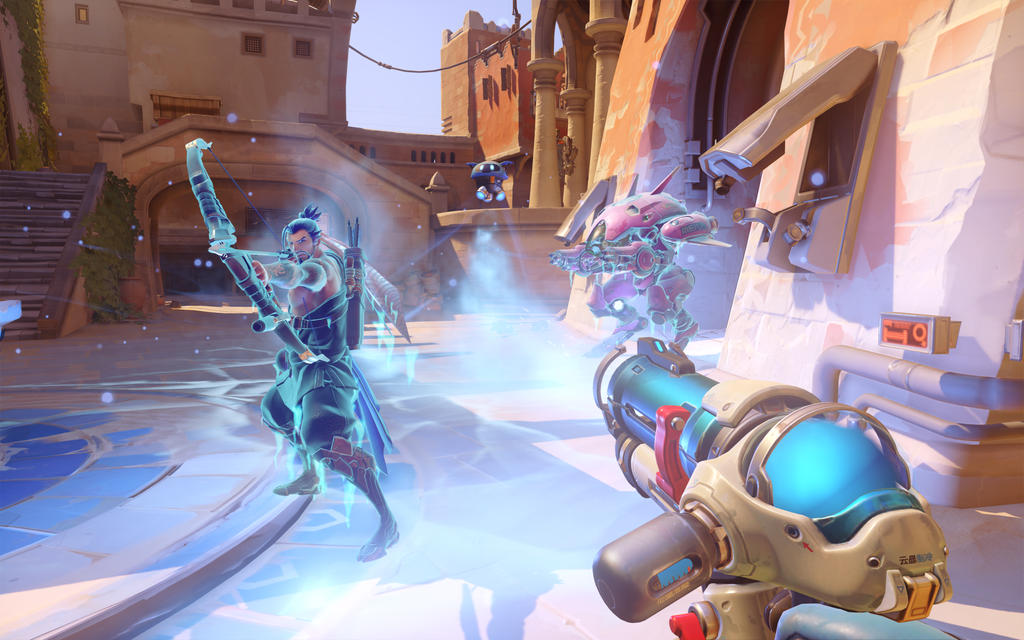
McCree is designed to be counter almost every hero in a 1 v 1 situation, so he is very hard to counter himself. McCree's tool-kit allows him to move around the edges of the map, isolating and picking off heroes - then pressing the advantage he just got with a Dead-eye. Between the terror his ultimate creates on the map, and the speed at which he can burst heroes; McCree is someone that has to be kept under control and checked at all times. (Trying to fix format of video placement sorry!)
 Let's look at McCree's numbers so we can better deal with him. McCree has 200 HP, a standard amount for defense and offense heroes. This means that critical shots from a Windowmaker or Hanzo will one shot him. His Peacekeeper is a force by itself dealing 35 damage at long distance, and 70 up close. While his Fan the Hammer cannot critically hit, all 6 rounds hitting a target in close quarters will deal 420 damage in 1 second. His combat roll is a key utility ability, reloading his Peacekeeper upon completion of the roll. It will move him 6 meters in the direction of his movement key, and has a 8 second cooldown. In 1v1 situations, McCree's Flashbang will stun you for .5 seconds dealing 25 damage, and be on cooldown for 10 seconds. Flashbang will automatically detonate at 5 meters or on any surface/hero, and if it does catch you his fan will deal 210 damage in that .5 second window.
Let's look at McCree's numbers so we can better deal with him. McCree has 200 HP, a standard amount for defense and offense heroes. This means that critical shots from a Windowmaker or Hanzo will one shot him. His Peacekeeper is a force by itself dealing 35 damage at long distance, and 70 up close. While his Fan the Hammer cannot critically hit, all 6 rounds hitting a target in close quarters will deal 420 damage in 1 second. His combat roll is a key utility ability, reloading his Peacekeeper upon completion of the roll. It will move him 6 meters in the direction of his movement key, and has a 8 second cooldown. In 1v1 situations, McCree's Flashbang will stun you for .5 seconds dealing 25 damage, and be on cooldown for 10 seconds. Flashbang will automatically detonate at 5 meters or on any surface/hero, and if it does catch you his fan will deal 210 damage in that .5 second window.Dead-Eye is one of the strongest ultimates in the game. Because he gains 160 damage per second that you stand in his Line of Sight, and it lasting 6 seconds, no target can survive this without hiding behind a wall or barrier. Even more, McCree's will not always use the ultimate on one or two heroes, but rather cancel it after 6 seconds retaining 50% of their ultimate charge and use the zoning power to press their advantage.
Work with your teammates. Countering most heroes starts with the idea that some heroes will help you deal with them directly, or indirectly. More so, usually this centers on what their abilities do to certain heroes. With McCree, his tool-kit is built around never losing a 1 v 1 engagement. Very few heroes, if any, can meaningfully duel a McCree, so when dealing with him we need to it in force. This guide, unlike a few of the others, will focus primarily on how you play against McCree, rather than what you need to pick to beat him. There are heroes to help you, but working as a team to harass and shut down a McCree is absolutely key.
 Remember when picking heroes to deal with McCree, you must work in tandem with your teammates to shut him down. While each of the following heroes will help with their abilities and play style, you must remember a McCree that is able to freely move around the sides of the map will get out of control. Forcing McCree to group up with his team and take teamfights without first getting picks is the primary way to negate his impact. Communicate with your team; keep tabs on him, call it out, and request help dealing with him. If you consistently use teamwork to shut down this lone ranger, he will be forced to play his hero in a less efficient manner or switch away from McCree.
If all else fails, do what McCree does, roam around the map and pick apart his team. Much like McCree has been slowly tearing down your teammates one by one, you can do the same to him. Most of the time he will not be thinking about his teammates and rather be concentrated on how to dismantle your team. If you create enough pressure, McCree will be forced to deal with you first - slowing and negating the impact he has on your team.
HardCounters to McCree
Mei (Easy-Medium Difficulty)
The epitome of losing to him 1v1, but helping your teammates never die to him. Mei is the perfect "in-tandem" hero to shut down McCree. Good usage of Ice Wall can prevent his flanks, or lock him in when he gets greedy. Coupled with your ability to Cryo-Freeze and block all his damage while healing allows you to help literally slow him down.
 Playing Mei against McCree is about creating a safe area for your team to operate in. Be that on defense, setting up outside of choke points in or near your point; or be it on offense, by locking out alternative paths to flank your advancing team.
Endothermic Blaster is strong weapon against McCree by itself, dealing 45 DPS and freezing after a couple of seconds of successful fire. The added alternate fire being a 100% accurate icicle also gives her some option at long range against McCree. Note that if you do freeze McCree with your primary fire, you can finish him in one icicle if it is a headshot! However, Mei will shine when you couple her with another hero. Because she can slow McCree down, and potentially freeze him, any hero with Mei shouldn't have too much trouble killing him.
Ice Wall will shine against sideline flankers like McCree. Because you can block off choke points, or create an artificial wall to cover behind, McCree will always have a lot harder time finding picks when Mei is looking to stall him up. When aware he is going to flank, you can Wall him off if the enemy team is also pressuring from another angle. This will buy your team valuable seconds to win the skirmish, then turn around together on McCree if he is still there. If the enemy team is no where to be found, and McCree is still looking to find a pick - Wall him into your team. This will allow you to quickly dispense of him and focus your efforts on the rest of the enemy team. Lastly, do not forget that Ice Wall can exploit the vertical aspects of maps, and can always be used to help teammates that cannot exploit it, like Soldier: 76.
 Cyro-Freeze is definitely the mvp here. A strong McCree is going to be aware of his threats, and keep a tab of what the enemies are doing in response to him. One way for him to operate more freely is to pick the heroes that are gunking up his gameplay - this is where Mei is different. Although with only 250 HP, Mei cannot consistently survive a Flashbang into Fan, she does have the HP pool to survive 3 shots of the fan and potentially block right after a Flashbang. This gives Mei more room to work with when dealing McCree, offering aggressive solutions if needed.
 Remember as Mei, we are weak alone but strong together. Work with teammates that can capitalize on your almost 2 second freeze to finish McCree off.
Soldier: 76 (Medium Difficulty)
Probably the only true counter to McCree's play style, is constant poking and controlling of the side routes of the map; Soldier: 76 is an ideal hero for this. Add his self-healing and sprinting, and he can quickly slow down a McCree's advance, and force him to setup and poke rather than pick.
Although Soldier should never win a close-range 1 v 1 engagement against McCree, a Good Soldier should never let his prey get this close. The strength of Soldier is his medium range suppression, and damage output when that suppression is not respected. His Heavy Pulse Rifle is 100% accurate for the first 3 shots - allowing for precision aiming and devastating damage. Couple his rifle's accuracy with the Helix Rocket Launcher he comes equipped with, and McCree will find it very hard to move around the map where Soldier is covering.
 The key to a good Soldier is maximizing your Rifle and Rockets accuracy to deter advances, and control the map. Setting up as Soldier on the sides of the map, so that you can cover one side and support the center lane is critical versus McCree. The big bonus to Soldier's method of dealing with McCree is it is ideal for both offense and defense. Sprint really begins to shine when we are consistently needing to move, either to advance after picks on offense, or retreat after deaths. Controlling the sides of the map is Soldiers specialty, and any McCree will be hard pressed to win the prolonged engagements a good Soldier will be forcing him into.
Against McCree, Soldiers Biotic Field will be of more use than ever. Because we want to keep McCree at arms length, and never let him advance on us, self-healing is paramount. Every shot you land versus a McCree is "permanent" damage, forcing him to consider finding a healer or health pack - where as all damage he has dealt to you is healed for your field. Also the healing from this ability being 40 HPS, negates half a shot from McCree every second. Using this ability when engaging a McCree will be a life saver and allow you to hold the angle for longer.

Remember - Soldier is not a 1 v 1 duelist like McCree, Tracer, or Genji. Soldier is a sideline controller, with strong damage output and self healing. When Soldier is played to his potential, McCree will always have to get through him first (ideally in a medium range engagement) before ever attacking Soldiers team. If McCree does get the upper hand, Soldier can quickly retreat with sprint to his teammates and focus down McCree in a larger group. Remember: stay at a distance, keep tabs of McCree, and fire in bursts.
Soft Counters to McCree
Genij (Very Hard Difficulty)
 Partially here because his complexity as a hero, and as a counter; Genji when played to his potential can duel a McCree, kill his teammates, and control the tempo of a match. Deflect is what gets Genji a mention against every hero of this nature. Because Genji can deflect Flashbang, Fan, and Dead-eye - Genji has the potential to completely shut down any McCree.
Genji is naturally more mobile than McCree, because of his double jump, wall-climb, and swift strike. These abilities allow Genji to manipulate any aspect of a map to his advantage, and flank the flankers. When playing against a McCree, Genji is excellent and keeping tabs on McCree's position by sitting above him; McCree has no vertical game himself and should be exploited heavily when playing Genji. Specifically in duels or skirmishes against McCree, Double Jump when used properly can force a McCree to use the whole range of his vision to properly aim at Genji, giving Genji another upper hand.
 Out side of his movement abilities, Deflect is by itself a trump card against the entirety of McCree's tool-kit. Every ability (except roll) can be deflected back at McCree for disgusting results. The key with deflect is baiting out Flashbang to be dodged, or to be deflected. Because it explodes automatically at 5 meters or when it connects with a surface, we have to be very close to deflect it. If you feel uncomfortable at first doing this, simple bait him into using before you go in for the kill. Deflecting his Fan is a much safer option, because McCree cannot cancel it once he has started. Lastly on Deflect remember you can deflect every shot of Dead-Eye if you are close enough - and if any of these are deflected at McCree he will die.
Patience, Precision, and Clarity of mind are keys to using Genji against McCree. This is a knife's edge match up, and will almost always favor the higher skilled player - so when using Genji to counter McCree do not rush anything. McCree prays on targets that do not move with a purpose because of flashbang, and this is doublely true with a hero such as Genji.
Hanzo (Medium Difficulty)
Snipers, when map aware, should naturally help deal with McCree via their supporting fire. Additionally, snipers in this game offer intelligence gathering abilities. Hanzo specifically comes built with two, Sonic arrow and Scatter Arrow. While Widowmaker does as well, the benefit to Hanzo is both are non-ultimate abilities and be used more consistently. When playing Hanzo against McCree, our wall-climb is incredibly important. Being vertical to McCree makes it much harder for him to pick you off with Flashbang into Fan. Assuming constant map awareness, when we properly exploit our verticality he should only be able to duel us at distance with primary fire.
 While at first Scatter Arrow is not traditionally thought of as a information gathering tool, using this ability in choke points or rooms can provide you with intelligence on if there are heroes in there. While not nearly as reliable as Sonic Arrow, this is still a way to manipulate the positioning of your opponents on top of giving intel. In a life or death situation against McCree this can also be your life saver; all arrows upon the impact bounce out at 90 degrees - calmly aim at McCree's feet and watch all the scattering arrows tear him apart. Since Scatter arrow only has a 10 Second cooldown, we can use it during the down time of Sonic Arrow to close the gaps of misinformation about enemies positions.
 Never let your guard down against McCree, if you are unaware of the map and McCree's position, snipers quickly become a liability for your team.
Reaper (Medium-High Difficulty)
A game of cat and mouse; Reaper is a hero decently suited for hunting down McCree with a partner or solo if needed. Wraith-Form will be the star of your tool-kit here, as it will allow to dodge flashbang, escape a lost duel, or sneak up on McCrees team. Where Reaper excels is his ability to do what McCree does; isolate and pick off heroes. If you cannot catch and kill the McCree, picking his teammates will force his hand and relieve pressure from your team. This is where Shadow-Step will be of most use to us. If we successfully flank McCree's team, he will have to respond to us before picking our teammates; less he risks taking a 1 v 3, or worse, engagement.
Wraith-Form is a much like flashbang, and deflect; the onus is on you to use it properly and negate other heroes abilities. Wasting this ability against a McCree is sure death, but proper timing will force a wasted flashbang and fan. Wraith-Form lasts for 3 seconds, giving us ample time to re-position for the upcoming fight. Unlike Tracers recall, this ability has no "cast-animation" and will immediately go into effect upon pressing the hotkey. Remember have patience, with precision Reapers Wraith-Form can always be used as Flashbang is being thrown out making him waste it; This forces him to either pick at us from a distance, or to risk it all and try to flashbang before we Wraith-From. If he is forced to back off, we have already do a lot for our team, freeing up the sides of the map.
 Again, do not force direct engagements with McCree unless you feel you have the upper hand over the specific player. The best way to counter McCree's play as Reaper is to force him to come to us, and stop us from killing his team. If he is the one pursuing use, we can dictate where and when the duels occur, and manipulate the environment to our advantage. This specific tactic will only work when there are picks to be found, so be aware of the maps conditions and enemy teams intentions for their strategy.
 Zarya (Medium-High Difficulty)
Here is one of the few heroes that can negate the flashbang's stun effect for themselves, and the only hero that can for their teammate. Zarya's Barriers are the only Barriers in the game that behave like this on a single target (Winston and Reinhardt's barrier will block the flash if you are on the other side), and block energy weapons consistently. Add her ability to use the alternate fire on her weapon to spam down McCree and his teammates, she is a strong filler choice against McCree.
 Barrier projection can be the difference maker in small skirmishes and team-fights. Saving your Healer from Dead-Eye, Flashbang, or even a few shots of Fan will quickly diminish the control McCree exerts over your team. Couple this with her ability to simultaneously self-project the barrier, she makes the an excellent partner to roam the sides hunting McCree. Because the Barriers block up to 200 damage in the 2 second duration (or all damage done in one instance) you can prevent half a Fan, an entire shot of Dead-Eye, and of course the damage and stun from Flashbang.
Zarya's Particle Cannon is an ideal weapon for any situation you find yourself in against a McCree. When hunting in tandem with our teammates, the Beam is easy to aim and deals a base of 80 DPS before any energy charge. The alternate fire, lobbing an energy grenade, deals 46 damage before energy charge, and has a small knockback element. Using your primary and alternate fire properly can help soften up or finish off McCree - do not be afraid to scuffle with him when your self-projected barrier is off cooldown! Because you have 400 HP (200 shields), with barrier you have a temporary pool of 600 and immune to his Flashbang. Playing with tenacity will help open up chances for your teammates to kill him.
Widowmaker (Low-Medium Difficulty)
Widowmaker, gives us information on McCree's position and intent much like Hanzo does. Using her grapple similar to a wall-climb, we can use the vertical aspects of each map to our advantage and force McCree into aim dueling with us at long distances. Widow's Kiss, her rifle, does 100 damage at full charge and will instantly kill a McCree with a headshot. Her Venommine is a offensive information tool, giving us advanced warning of flankers. And last but not least, her Infra-Sight will provide the team with 15 seconds of "wall-hacks" preventing any unnoticed flanks by McCree.
 Again like Hanzo, Grapple is a great ability to exploit the vertical aspects of the map. This has a 20 meter distance, and can be used to move laterally as well to escape from pursuing enemies. Be aware of its 12 second cooldown when are being pursued - one good use can save you, or one wasted use can leave you to die.
Venommine is another great ability to help gather intel on where McCree is and when he will be flanking your teammates and you. This ability has the added benefit of dealing 75 damage per second, which could make or break a heated engagement between you and McCree. Placement is key when dealing with flankers, know what routes your mine will cover, and consistently check the others. Also try to use this ability on door-frames, corners, or any other place the enemy couldn't see it until they have been effected by it.
Infra-Sight, although an ultimate, is one of the easier ones to charge up quickly when you are consistently tagging enemies. Even if you are not killing them with head shots, you will gain 5% ultimate charge per full charge shot. If you do land a head shot, you gain 10%. When Infra-Sight is up your team and you gain 15 seconds of "wall-hacks" and make keeping track of McCree much easier.
Snipers are very vulnerable to McCree when you are not actively looking for him or aware of his position. Be vigilant, or you become a liability for your team.
Comments
Post a Comment